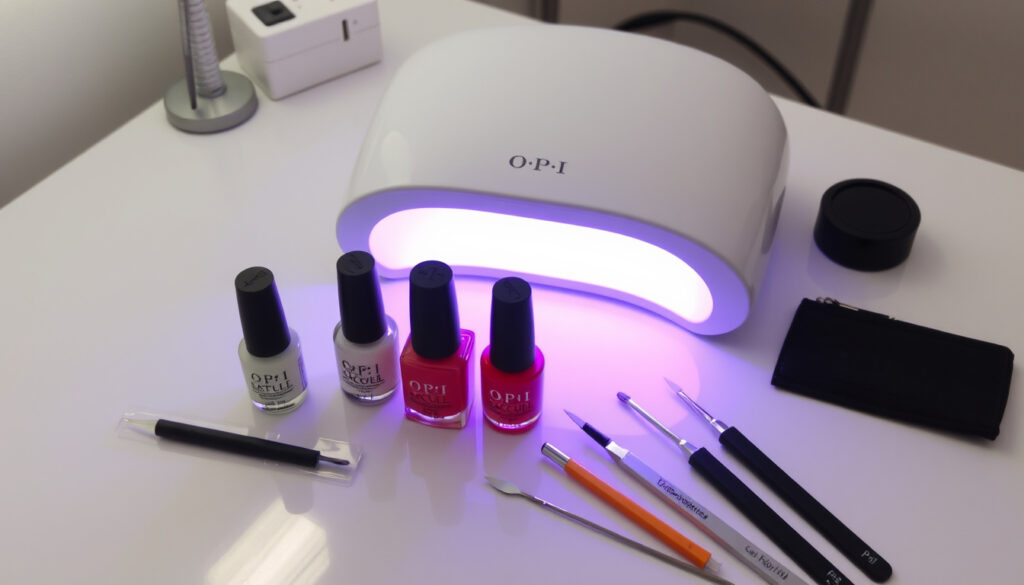
OPI Gel Nail Polish: UV Lamp, Application, and Mistakes
You’ve probably seen the rows of OPI bottles at the salon and wondered if you could get that same glossy, chip-free finish at home. The answer is yes — but the process is a little more precise than standard polish, and the guide covers everything from UV lamp requirements to application steps and common mistakes.
Wear time: Up to 3 weeks · Shades available: Over 200 · Cure time per coat: 30 seconds · Soak-off removal: Yes · Hema-free formulas: Available · Requires UV/LED lamp: Yes
Quick snapshot
- OPI GelColor requires UV/LED lamp for curing (OPI (official manufacturer))
- Cures in 30 seconds per coat (OPI blog)
- Lasts up to 3 weeks (OPI professional education)
- Best lamp wattage for OPI gel (Nail Supply Store (retailer guide))
- Whether all OPI gels are Hema-free (OPI (no official list))
- Long-term effects of frequent gel use (OPI YouTube (newer tutorial))
- Soak-off removal is recommended (OPI YouTube tutorial)
- 2019: Classic GelColor tutorial published (OPI YouTube)
- 2025: GELement at-home line launched with 60-second cure (OPI YouTube)
- 2026: Updated blog application guide (OPI blog)
- Increasing availability of Hema-free options (OPI)
- Growth of at-home gel systems (GELement) (OPI YouTube)
- More retailer education on safe removal (Nail Supply Store)
Key specifications for OPI gel polish are summarized below.
| Label | Value |
|---|---|
| Brand | OPI |
| Type | UV-cured gel polish |
| Wear time | Up to 3 weeks |
| Shades | 200+ |
| Price range | $10–$20 |
| Requires UV/LED lamp | Yes |
| Hema-free options | Available |
Does OPI Gel Polish Require a UV Lamp?
How UV curing works for gel polish
Gel polish contains photoinitiators that harden under UV or LED light. OPI’s GelColor system is designed for use with a UV or LED lamp. According to the official instructions from OPI (professional education page), the recommended cure time is 30 seconds per coat when using an OPI Star Light Gel Lamp. The brand’s blog also confirms that each layer — base, color, and top — should be cured for 30 seconds under an LED lamp (OPI blog).
Without a lamp, the polish won’t cure. If you don’t own a UV/LED device, you’ll need to buy one — or choose OPI’s GELement line, which includes a smaller lamp in the starter kit.
OPI GelColor vs. GELement: lamp requirements
OPI now offers two gel systems. GelColor, the professional line, cures in 30 seconds per layer. GELement, introduced in 2025, uses a smaller lamp and cures each layer for 60 seconds (OPI YouTube (2025 GELement tutorial)). The difference matters: if you’re using a standard UV lamp, GelColor works; GELement requires its proprietary lamp.
The pattern: OPI’s newer at-home line sacrifices speed for simplicity, targeting beginners who want a foolproof system.
OPI Gel vs. Regular Gel vs. Shellac: What’s the Difference?
Here’s a side-by-side comparison of OPI GelColor, Shellac, and standard gel polish.
| Feature | OPI GelColor | Shellac | Regular Gel |
|---|---|---|---|
| Wear time | Up to 3 weeks | Up to 3 weeks | 2–3 weeks |
| Cure time per coat | 30 seconds | 30 seconds | 30–60 seconds |
| Color range | 200+ shades | ~100 shades | Varies |
| Removal | Soak-off in acetone | Soak-off in acetone | Soak-off in acetone |
| Price per bottle | $10–$20 | $10–$20 | $8–$15 |
Key differences in formulation
OPI GelColor is a hybrid polish that cures under UV/LED light, similar to CND Shellac. The main difference is that OPI offers over 200 shades, while Shellac has a smaller color range. Both are soak-off gels, but OPI’s formulation is known for its high-gloss finish and durability (OPI professional page). A retailer guide from Nail Supply Store (beauty retailer blog) notes that OPI GelColor can be cured under an OPI LED light for about 30 seconds per coat.
Wear time and removal
Both OPI Gel and Shellac claim up to 3 weeks of wear. Removal is similar: soak in acetone. OPI’s official instructions recommend buffing the surface, soaking in acetone, and gently pushing off the softened gel (OPI YouTube tutorial).
Price comparison
OPI GelColor retails for $10–$20 per bottle, comparable to Shellac. Starter kits (including lamp) cost $50–$100. GELement kits are priced around $40–$60 (Nail Supply Store).
The trade-off: OPI gives you more color choices and a slightly faster cure time than Shellac, but both require careful removal to avoid nail damage.
Can You Use OPI GelColor at Home?
Required tools and lamp
Yes, you can use OPI GelColor at home, but you need the right equipment: a UV or LED lamp, base coat, color, top coat, nail prep products, and acetone for removal. OPI’s blog emphasizes that the base coat should be shaken vigorously for 1 minute before application (OPI blog).
Step-by-step at-home application
- Clean nails, push back cuticles, and buff the surface.
- Apply a thin coat of base coat – shake vigorously for 1 minute first, then cure 30 seconds.
- Apply two thin coats of color, curing each for 30 seconds.
- Apply top coat and cure 30 seconds.
- Wipe off the sticky residue with N.A.S. 99 (OPI (professional education)).
- Finish with cuticle oil.
GELement line for true beginners
For those new to gel, OPI’s GELement line is designed specifically for at-home use. It comes with a smaller lamp and cures each layer in 60 seconds (OPI YouTube (2025 GELement tutorial)). The system is simpler — no need to shake the base coat for a minute, and the lamp is included.
Why this matters: GELement lowers the barrier for beginners, while GelColor remains the go-to for experienced users who want faster curing and more shades.
Is OPI a Good Gel Nail Polish? Pros and Cons
Advantages: durability, color range, shine
- Chip-resistant for up to 3 weeks (OPI (professional education))
- Over 200 shades available (OPI)
- High-gloss finish that lasts (OPI YouTube)
Disadvantages: cost, removal difficulty, potential damage
- Requires UV/LED lamp (additional cost) (OPI)
- Removal can damage nails if done improperly (Nail Supply Store)
- Long-term effects of frequent gel use are unclear (OPI YouTube)
Upsides
- Long-lasting shine and durability
- Wide color selection
- Available in Hema-free formulas
Downsides
- Initial investment in lamp
- Time-consuming removal
- Risk of nail thinning with frequent use
The catch: OPI delivers professional results, but it demands proper technique and patience — especially during removal. For casual users, the upfront cost may not be worth it.
How to Apply OPI Gel Polish Correctly (and Avoid Common Mistakes)
Preparation steps
Begin with clean, dry nails. Push back cuticles, gently buff the nail surface, and wipe with alcohol to remove dust. OPI’s 2019 tutorial emphasizes avoiding flooding the cuticle area (OPI YouTube).
Application technique
Apply a thin coat of base coat (shake vigorously for 1 minute first), cure 30 seconds. Then apply two thin coats of color, curing each for 30 seconds. Cap the free edge to prevent chipping. Finish with top coat, cure, and wipe residue (OPI blog).
Common mistakes and fixes
- Thick coats: leads to wrinkling and improper curing. Solution: apply thin, even layers.
- Flooding cuticles: causes lifting. Solution: leave a small gap around the cuticle.
- Skipping cap: reduces wear time. Solution: brush the free edge of each nail.
- Not shaking base/top coat: air bubbles. Solution: shake for 1 minute as instructed (OPI blog).
The most common gel polish mistakes — thick coats and flooded cuticles — are precisely the ones that new at-home users make. OPI’s GELement line tries to solve this by simplifying the process, but the core technique remains the same.
The implication: mastering these basics is essential for lasting results.
What’s Confirmed and What’s Uncertain
Confirmed facts
- OPI GelColor requires UV/LED lamp for curing (OPI)
- Cures in 30 seconds per coat (OPI blog)
- Lasts up to 3 weeks (OPI professional education)
What’s unclear
- Best lamp wattage for OPI gel — varies by lamp brand (Nail Supply Store)
- Whether all OPI gels are Hema-free — no official list (OPI)
- Long-term effects of frequent gel use — limited research (OPI YouTube)
- Soak-off removal is recommended but may depend on technique (OPI YouTube tutorial)
“You want to avoid flooding the cuticle area — that’s the number one cause of lifting.”
— OPI YouTube tutorial (2019)
“The GELement system is designed for at-home users who want a salon-quality finish without the learning curve.”
— OPI YouTube (2025 GELement tutorial)
For anyone considering OPI gel at home, the choice between GelColor and GELement comes down to how much time and precision you’re willing to invest. GelColor gives you faster curing and more shades, but demands a UV lamp and careful technique. GELement offers a simpler, all-in-one kit with a slightly longer cure time. For the average user in the US, the GELement starter kit is the safer bet — less risk of mistakes, lower upfront cost, and still delivers that OPI shine. If you’re a pro or a seasoned DIYer, stick with GelColor for the speed and color variety.
youtube.com, youtube.com, cncinternational.eu, kirstymeakin.com, beetlesgel.com, opi.com
For a comprehensive overview of colors, reviews, and at-home techniques, check out the OPI Gel Nail Polish Guide.
Frequently asked questions
How to remove OPI gel polish without damaging nails?
Buff the surface, soak cotton pads in acetone, wrap with foil, wait 10–15 minutes, then gently push off the softened gel. Avoid peeling or scraping.
Can I use OPI GelColor with a different brand lamp?
Yes, as long as the lamp has sufficient wattage (typically 36W or higher). OPI recommends their own lamp for optimal results, but many LED lamps work.
Does OPI gel polish expire?
Yes, like all gel polishes, it has a shelf life of about 2–3 years. Check for separation or a tacky consistency.
What is the best OPI gel color for short nails?
Neutral shades like “Bubble Bath” or “Put It in Neutral” are popular for short nails because they elongate the nail bed.
How to make OPI gel polish last longer?
Follow the application steps: cap the free edge, avoid thick coats, and use cuticle oil daily.
Is OPI gel polish vegan and cruelty-free?
OPI is cruelty-free (not tested on animals) and many shades are vegan. Check the label for “vegan” status.
What is the difference between OPI GelColor and Infinite Shine?
GelColor is a UV-cured gel that lasts up to 3 weeks. Infinite Shine is a lacquer (no lamp needed) that lasts up to 11 days.
More related posts
 Best TV Shows 2025: Top Series by Critics & Audience
 How to Fall Asleep Fast: 6 Expert-Backed Techniques
 What Is the Price of Gold Today? Live Spot Price (USD & Ireland)
 Oreimo: Plot, Ending & Controversy Explained
 When Did Minecraft Come Out? Dual Release Dates Explained
 How Many Stamps Do I Need – 2025 USPS Postage Guide
 450+ This or That Questions: Fun, Flirty, Kids & More