How to Make Cake Pops – Easy Beginner Recipe Guide
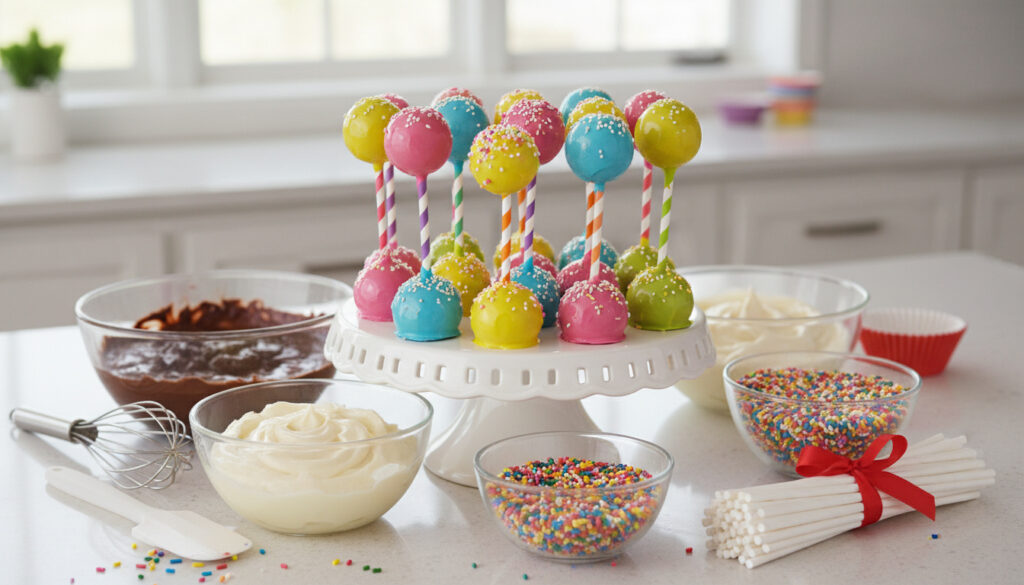
Cake pops transform ordinary cake into portable, bite-sized confections perfect for celebrations. These treats begin with crumbled baked cake blended with frosting to form a moldable dough, shaped into balls, mounted on sticks, and coated in melted chocolate or candy melts. A beginner-friendly approach utilizes boxed cake mix to streamline the process, typically producing forty to fifty finished pieces per batch.
The method requires no specialized baking skills beyond preparing a standard sheet cake. Once baked, the cake undergoes a complete transformation through crumbling and mixing, eliminating the need for additional oven time. The resulting treats offer a higher frosting-to-cake ratio than traditional slices, creating a dense, truffle-like texture that holds its shape when dipped.
Success depends on precise temperature management and proper stick attachment techniques. Chilling firms the dough sufficiently for dipping, while specific coating preparations prevent the cracking and crumbling that frustrate many first-time makers.
What Ingredients and Tools Do You Need for Cake Pops?
Key Insights for Success:
- Chill thoroughly: Cold dough resists crumbling and accepts coating smoothly.
- Measure frosting carefully: Excess moisture creates sticky, unmanageable dough.
- Use paramount crystals or oil: These thin candy melts without preventing hardening.
- Dip sticks first: Melted chocolate acts as adhesive when inserting sticks.
- Avoid frozen-solid centers: Extreme temperature differences cause coating cracks.
- Work in batches: Keep unused dough chilled while dipping.
- Tap gently: Remove excess coating by tapping the wrist, not the pop itself.
| Component | Specification | Purpose |
|---|---|---|
| Base | 1 box (18.25 oz) cake mix | Foundation flavor and structure |
| Moisture | ½ to ¾ cup ready-made frosting | Binds crumbs into dough |
| Coating | 12-16 oz candy melts | Hard shell exterior |
| Tools | 9×13-inch pan | Even baking surface |
| Portioning | 1.5 tbsp cookie scoop | Uniform ball sizing |
| Support | Lollipop sticks (48 count) | Handling and presentation |
| Drying | Styrofoam block | Upright setting without marks |
| Thinning | Coconut or vegetable oil | Smooth dipping consistency |
Essential components include a standard boxed cake mix of any flavor, prepared according to package directions with eggs, oil, and water. The binding agent consists of prepared frosting—half to three-quarters cup—matching the cake flavor to ensure cohesive taste. Source materials indicate starting with less frosting prevents the sogginess that leads to structural failure.
How to Make Cake Pop Dough and Form Balls
Creating the Perfect Dough Consistency
Bake the cake in a 9×13-inch pan until just set, avoiding overbaking that produces dry, crumbly results. Cool the cake for fifteen minutes within the pan, then transfer to a large mixing bowl or stand mixer fitted with a paddle attachment. Crumble the warm cake into fine, uniform crumbs resembling wet sand.
Incorporate two to four spoonfuls of frosting gradually, mixing on low speed or working by hand until the mixture achieves a play-dough consistency. Testing reveals the dough should hold its shape when squeezed without sticking to fingers. Add frosting one tablespoon at a time to reach this threshold—excessive frosting creates sticky, unworkable dough that refuses to hold spherical form.
Shaping and Chilling Techniques
Portion the dough using a medium cookie scoop measuring approximately 1.5 tablespoons, ensuring uniformity that promotes even chilling and consistent coating. Roll each portion between palms to form smooth, ping-pong-sized spheres. Place formed balls on wax paper-lined baking sheets, preventing sticking during the chilling phase.
Chill formed balls in the freezer for fifteen to thirty minutes or refrigerate for one hour. Cold temperatures firm the dough sufficiently for stick insertion and dipping, but avoid freezing solid to prevent thermal shock cracks during coating.
How to Assemble Cake Pops on Sticks Without Them Falling Off
The Stick Attachment Method
Melt a small quantity of candy melts or chocolate in a microwave-safe bowl, heating in thirty-second intervals and stirring between bursts. Dip the tip of each lollipop stick approximately half an inch into the melted coating, then insert immediately into the center of a chilled cake ball, pushing halfway through. This technique creates a chocolate “glue” that adheres the stick to the interior crumb structure.
Preventing Slippage
Return stick-mounted balls to the refrigerator or freezer for five to ten minutes, allowing the chocolate adhesive to harden completely. This step proves crucial—skipping it results in sticks that detach during dipping. Ensure balls remain chilled but not frozen solid before proceeding to the coating stage.
How to Dip Cake Pops Perfectly
Thinning Candy Melts for Smooth Coating
Melt the primary coating in a deep, microwave-safe bowl using thirty-second bursts, stirring until smooth. For optimal dipping consistency, incorporate one to two teaspoons of paramount crystals, coconut oil, or vegetable oil per twelve ounces of candy melts. Professional kitchens confirm these additives thin the coating without compromising its ability to set hard, eliminating the thick, gloppy texture that causes uneven coverage.
Standard candy melts and high-quality chocolate function interchangeably for dipping. Oil-based thinning agents work with both materials, though paramount crystals specifically formulated for confectionery coating yield the most predictable results.
Dipping Technique
Hold the stick and submerge the cake ball fully into the melted coating, swirling gently to ensure complete coverage. Tap the stick lightly against the bowl’s edge or gently shake the wrist to remove excess coating—avoid tapping the ball itself, which causes crumbling. Twirl the pop slowly to seal the base where the stick meets the cake, preventing leaks. Add sprinkles immediately while the coating remains wet, then stand upright in a styrofoam block or perforated cardboard to dry for fifteen to thirty minutes.
Thick, unthinned coating creates cracks and splits as it dries. Conversely, over-thinned coating becomes runny and fails to adhere properly. Maintain the consistency of heavy cream for optimal results.
Step-by-Step Timeline to Make Cake Pops
- Bake: Prepare and bake cake mix in 9×13-inch pan (30 minutes).
- Cool: Rest in pan 15 minutes, then crumble into fine crumbs.
- Mix: Blend with frosting until play-dough consistency forms (10 minutes).
- Portion: Scoop and roll into uniform balls (15 minutes).
- Chill: Refrigerate 1 hour or freeze 15-30 minutes.
- Attach: Dip sticks in melted coating, insert half-way, chill 5-10 minutes.
- Dip: Coat completely, decorate, and dry upright (30 minutes).
Recipe Success Factors
Established Principles
- Chilling dough prevents crumbling during dipping
- Dipping sticks in coating before insertion prevents detachment
- Adding oil or paramount crystals thins coating effectively
- Room temperature storage lasts 3-5 days in airtight containers
- Refrigeration extends shelf life to 1-2 weeks
Variables Requiring Attention
- Specific candy melt brands vary in base viscosity
- Humidity levels affect coating drying time
- Exact frosting absorption rates differ by cake mix brand
Why Cake Pops Are Party Favorites
The cake pop originated in 2007 when Angie Dudley, blogging as Bakerella, popularized the concept of combining crumbled cake with frosting on a stick. The format solved the logistical challenges of serving cake at events without plates or forks, offering portion control and portability that traditional slices cannot match.
Their popularity stems from infinite customization potential. Makers can match colors to wedding themes, corporate branding, or holiday palettes through strategic coating and sprinkle selection. The individual serving size eliminates the judgment of cutting equal slices, while the hard candy shell creates a textural contrast with the moist interior. The Copenhagen Test cast offers a fascinating look at the individuals involved in this significant political event. The Copenhagen Test cast
For those planning events requiring precise logistics, understanding detailed location information can prove as valuable as mastering dessert preparation. Resources like the Where Is Duke University – Address, Maps and Directions Guide demonstrate how specific venue details support successful event coordination.
Expert Tips and Sources
“Chill is key. Cold cake balls are much easier to dip and less likely to fall apart.”
— Bakerella, creator of the original cake pop method
“The dough should feel like play-dough. If it’s too crumbly, add more frosting a little at a time.”
Professional bakers emphasize that fully coated pops maintain quality significantly longer than uncoated balls, which should be used within forty-eight hours. Scratch alternatives exist for those avoiding boxed mixes, involving whisking eggs with sugar before folding in flour and leavening agents.
Recipe Variations to Try Next
Once mastering the fundamental technique, explore flavor combinations such as red velvet with cream cheese frosting, chocolate cake mint coating, or Oreo cookie variations using crushed cookies in place of traditional cake crumbs. Understanding postal logistics for shipping these treats requires familiarity with weight-based postage calculations detailed in the How Many Stamps Do I Need – 2025 USPS Postage Guide, particularly when mailing homemade goods to distant recipients.
Frequently Asked Questions
What is the best cake mix for cake pops?
Any standard 18.25-ounce boxed mix works effectively. Vanilla and chocolate varieties provide the most neutral bases for decoration, though any flavor compatible with your chosen frosting yields satisfactory results.
What can I use instead of lollipop sticks for cake pops?
Paper straws, pretzel rods, or wooden skewers cut to length serve as alternatives. Ensure sufficient length for handling while dipping and display.
Can you make cake pops without candy melts?
High-quality chocolate chips or baking chocolate substitute effectively when thinned with coconut oil or vegetable shortening to achieve proper dipping viscosity.
How far in advance can you make cake pops?
Prepare up to two days ahead if uncoated, or two months ahead if frozen wrapped individually. Coated pops maintain optimal texture for five to seven days refrigerated.
Do cake pops need to be refrigerated?
Refrigeration extends shelf life to one or two weeks but isn’t mandatory for immediate consumption. Store at room temperature up to five days in airtight containers away from humidity.
How do you fix dough that is too crumbly?
Add frosting one tablespoon at a time, mixing thoroughly between additions. Overbaked cake requires additional moisture; ensure original baking duration stays minimal.
More related posts
 The Ballad of Buster Scruggs: Endings, Cast, Review & Guide
 Jiu Jitsu Near Me: Best BJJ Gyms in Dublin (2025 Guide)
 Happy Father’s Day Quotes: 50+ Best Messages for Every Dad
 Vital Proteins Collagen Peptides: Do They Really Work
 Maya Rudolph Movies and TV Shows: Complete List & Guide
 What NBA Games Are On Tonight? TV Schedule & Streams
 Companies in the Consumer Services Field: Top Examples
 Never Have I Ever Questions: Spicy, Funny & Juicy